Case Study #1
The Ginger Man
Showcasing Aperture
After nine miles of walking around and exploring on our second day in Dublin, my boyfriend and I stumbled upon a bar called The Ginger Man. While he went inside to grab drinks, I rested my sore feet and glanced around through my sunglasses. Bright, beautiful conditions. The sunlight fiercely illuminated the area.
To my left was The Ginger Man Bar sign, posted boldly against the building. I remember my tired eyes lighting up at the idea of capturing this moment on film. I grabbed the Pentax out of my bag, pulled back the film advance lever, checked the shutter speed, one-two hundred and fiftieth of a second, perfect, and looked through the view finder to place the sign into focus. Snap.
But as soon as the camera was placed back down onto my lap, I noticed that the aperture on the lens was set to f/11. As a bystander, you may be thinking: Well, no worries. What’s the big deal?
With the sun perfectly hitting the sign and illuminating those bright, scarlet red letters, I knew that no amount of post-editing would satisfy my original vision for this moment. My first thought was of the slight layer of haze that might appear across the crisp sign once developed. I quickly shifted the F-stop on the lens to f/16, the minimum aperture. Snap.
Whether you’re a photographer or not, the amount of light let into any camera should matter. Gauging the lighting in your surroundings and double checking the camera’s manual settings, especially when shooting film, is all for the benefit of the final exposure. You won’t get to see it until all exposures are shot and the reel has been developed, so your knowledge of how to manipulate each setting must be sharp. For me, I went through many rolls of film, basing the results off sheer luck and a bit of trial/error, until I started writing them down in a notebook. After collecting hundreds of references, my experience felt solidified, and I could trust my instincts.
The most aesthetically pleasing end result, with the advantage of spending as little time editing the digitalized photo as possible, all depends on how you utilize your settings. Case Study #1: The Ginger Man is a fine example of this.
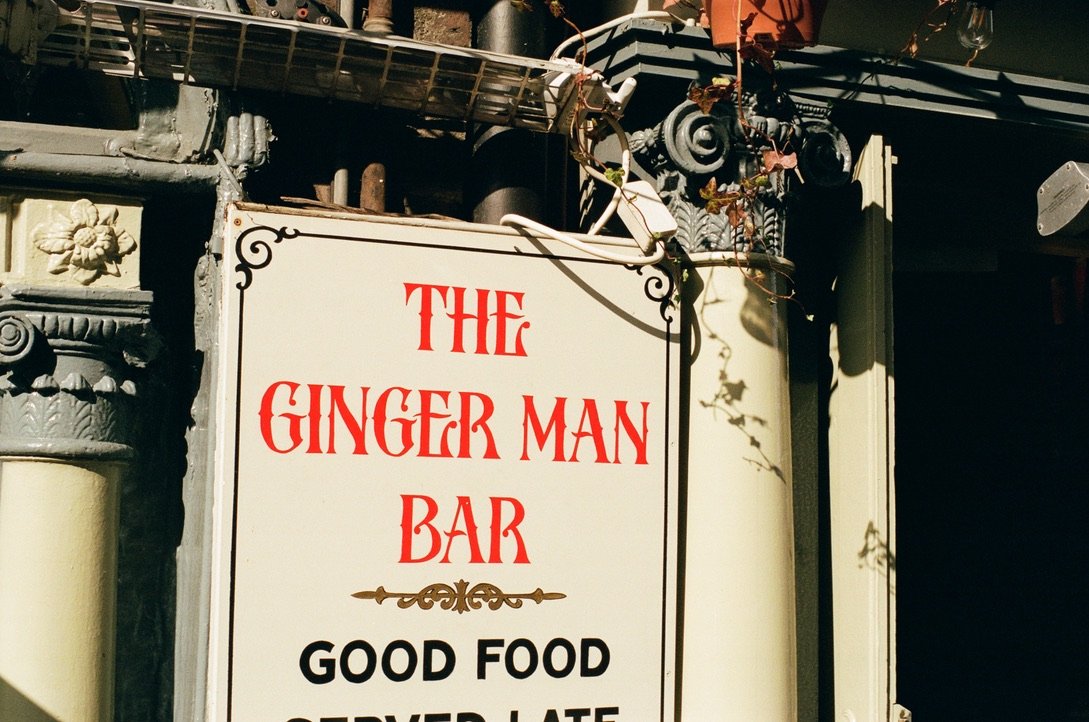
Shutter speed: 1/250
F-stop: f/11 (second lowest aperture)
As you can see, the raw negative looks washed out. Shadows are blue, the lettering appears hazy, and the noise is more prominent. Although it gives the photo a vintage look, it is slightly out of focus. Using f/11 in conjunction with a high shutter speed during bright sunlit conditions mutes all of the naturally vivid coloring.
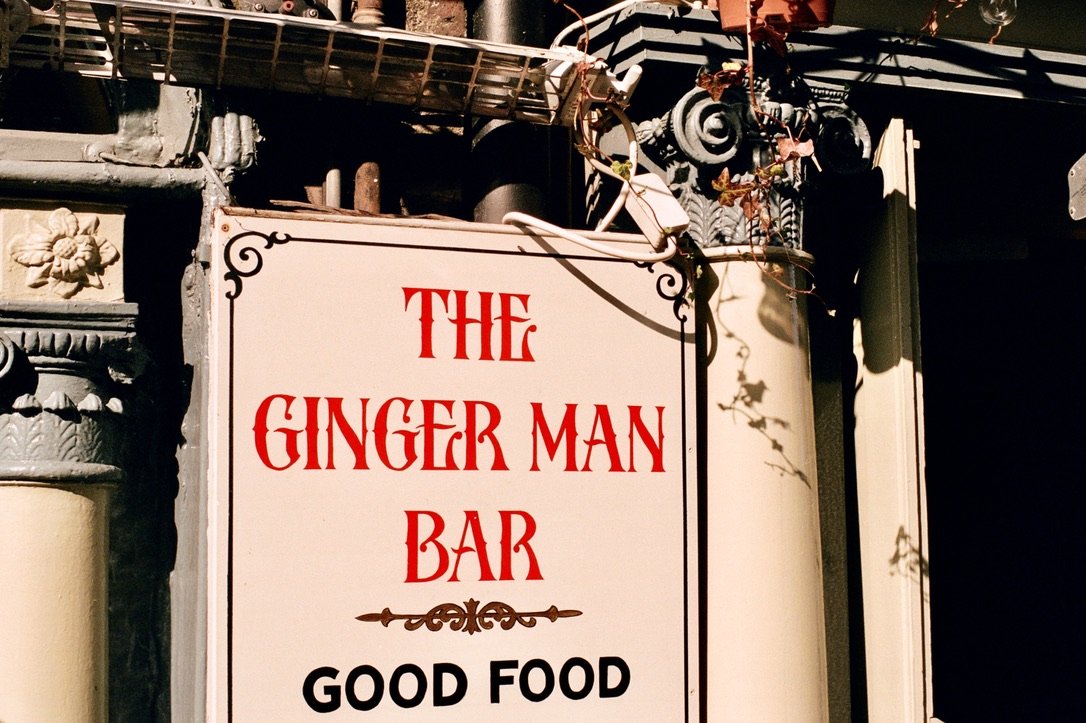
Shutter speed: 1/250
F-stop: f/16 (lowest aperture)
After shifting to the proper setting, you may notice how much more naturally crisp the image is. Using f/16 in a clearly sunny location allows for all the colors to pop, reduces noise, and sharpens the overall outcome of the raw negative. Everything here is now in focus due to the low f-stop.
Final enhanced, adjusted, and cropped image.
Each photographer has their own aesthetic and vision. Because film photography is an art form to me, I chose to slightly enhance the brilliance and contrast to let the pinkish hue compliment the scarlet red lettering for a more visually pleasing color palette across the image.
The End Result
From one amateur film enthusiast to another, I hope that this dissection and showcase on aperture helps. Take the time to get to know what each setting could do to an exposure in the different types of environments and conditions that you encounter. Patience and exploring your own method of trial/error can go a long way when it comes to gaining experience. Just continue to practice your passion. The lessons learned will become invaluable.
For a more in-depth and technical definition, or if you’re looking to dive deeper down the rabbit hole of aperture, then this outsourced article is for you: What is lens aperture?


